Sunday, 21 March 2021

Brownies for the Soul


Lockdown in London is in full swing and despite having more negatives than positives, finding the light every single day has become my mission. I am finding that it's the little things in life that help lift the spirits at the moment, from deliciously long bubble baths and weekend walks, to finding a new favourite show on Netflix and baking scrumptious goodies. I have been loving baking brownies recently and I just had to share my favourite lockdown treat with you all. 

It's a slight departure from my usual beauty content but this is baking and brownies to feed our souls - which counts as inner beauty, right? 

This is a Mary Berry recipe (which explains why it is so great) but I have made a couple of adjustments. The original recipe is from Mary Berry's Complete Cookbook - I found it here.

You will need: (makes 24 squares, depending on your cutting skills)

375g plain chocolate, broken into pieces

250g butter

2 teaspoons instant coffee

2 tablespoons hot water

2 eggs

250g caster sugar

1 teaspoon vanilla extract

90g self-raising flour

250g plain chocolate chips (over the many brownie batches I have whipped up, I have used dark, milk and a mixture of white and milk chocolate drops and as you can probably guess, all options were deliciously divine. The brownies pictures were made with milk chocolate drops!) 

The main event: 

First things first, you’ll want to grease a 30x23 cm baking tin and line it with greaseproof paper, then grease the paper - to ensure that you have no disasters with brownies not wanting to exit the tin. 

You will need to preheat your oven to 180°C/Fan 160°C/gas 4.

Next up its time to create the most delightfully delicious mixture of chocolate and butter. Smash your chocolate into pieces and pop them into a bowl, alongside your cubbed butter. Pop the bowl on top of a pan of boiling water ‘al-la bain-marie’ and let the two melt, stirring to combine. 


Be patient as the butter-chocolate mixture turns liquid, melting into a rich, silky smooth puddle of molten deliciousness. Once it’s melted and combined, take it off the water and put it to one side to cool, making sure to sneak one tiny taste - quality control is everything when making brownies! 

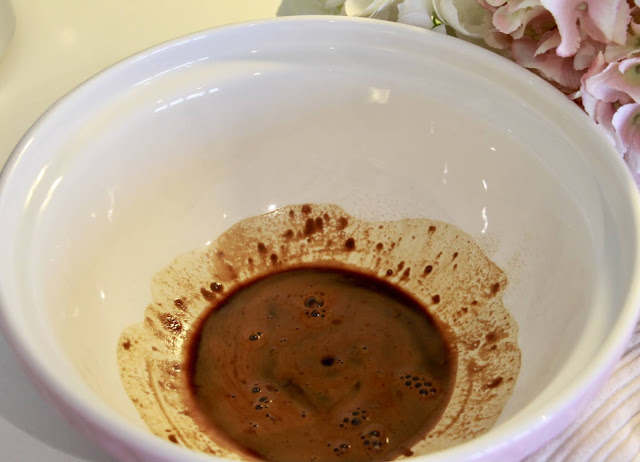
Boil the kettle and pop the instant coffee into a large mixing bowl, before adding the hot water and stirring to dissolve. 


Time to add the sugar, eggs and vanilla extract to the coffee, before beating the whole lot together. I find the more air you can get into the mixture at this point, the better. Whisk until the mixture has doubled in volume and has turned a gorgeous toffee colour. 

Take your mixture from this... 


To this ... it should have (roughly) doubled in volume.


Next up you’ll want to add your chocolate mixture to the eggs and sugar. 
Gradually tip the chocolate lava into the eggs and sugar mix a tiny bit at a time, beating as you go, making sure that the chocolate is fully combined before you add more. 


The mixture should turn a delightful chocolate brown colour and begin to thicken and should end up looking like this... 


Once you have a devilishly thick, richly coloured mix, you’ll want to sift in the flour and fold it in to combine. 


Once the flour is combined, the mixture should be wonderfully thick and a tad more 'batter-like' 


When there are no more flecks of white to be seen, add the chocolate drops and gently stir the mix until they are evenly combined.


The original recipe calls for walnuts too - which I am sure would be delicious, I just haven’t added them to mine this time!

Ease the thick mixture into your prepared tin and pop it into your preheated oven, ready for baking. The brownies should take between 35-45 minutes, depending on how hot your oven runs. 

I find that around 40 minutes is perfect. You want the crust to be crisp and slightly dull, while the middle remains gorgeously gooey. 

The edges of this batch caught a little in the oven, I was two minutes late taking them out of the oven! 


Once they are done, pop them on the side and admire your handiwork. 

You’ll need to wait for them too cool before lifting the whole thing out, using the paper, onto a cooling rack. 

You’ll find that they are very gooey to start off with, but they will firm up and be perfect served with a cup of tea or a glass of cold milk. 


    Enjoy xx


SHARE:

Wednesday, 17 March 2021

Smokey Eyes in a Hurry


Fancy a super quick, glamorous makeup look that’s really easy to do? I have got you covered with this really easy smokey eye tutorial. It's a one-product solution to a smokey eye that’s great if you are in a hurry or you are new to doing smokey eyes. 

If you are on the hunt for one the of best (in my humble opinion), one-product-eye makeup solutions, look no further than the By Terry Ombre Blackstars. Super creamy and easy to apply, they double as a cream eyeshadow, eyeliner and even a highlighter (depending on the colour). 


Let me know what you think of this look - it's my go-to when I need something that looks put-together, in a hurry! 


SHARE:

Sunday, 31 January 2021

Beauty Tips that Every Girl should Know

One of the many things that I love about beauty is that there is always something new to learn. Everyone has a different method and often, as with everything, the more mistakes you make - the more you learn. I thought I would share with you some of the top tips and tricks that I have learnt from being a makeup artist, learning from others and generally being a beauty obsessive - not to mention making my own fair share of beauty mistakes along the way! 


1. Use a setting spray to set your makeup

You leave the house with perfect makeup, go about your day only to look in the mirror at lunch to find that half of your concealer has melted off, meaning that your nose is looking a tad red - sound familiar? In order to stop any makeup malfunctions throughout the day, setting spray is going to be your new best friend. Working to set your makeup in place, these miracle mists provide extra hold, without adding any ‘weight’ to your complexion or leaving your skin feeling ‘tight’. There are lots of different options for every budget, from Collection, to Urban Decay and Charlotte Tilbury. 

I heard a little something about using hairspray to ‘set’ your makeup - please, whatever you do - don’t do this! 


A couple of my favourites: 1. Elf Dewy Setting Spray, 2. Urban Decay All Nighter, 3. Charlotte Tilbury Airbrush Flawless Finish, Maybelline Lasting Fix 

2. Lip Balm for the Eyebrows - and (nearly) everything else!

Lip balm is something that everyone has in their handbag and can be used for a multitude of different things including, of course, your lips! Dab a touch of clear lip balm on the high points of your cheeks and voila - you have a natural highlighter. Take a touch of lip balm on a disposable mascara wand (or an old, clean mascara wand) and use as you would brow gel. The clear balm works to tame brows and hold them in place! 


3. Bobby Pins - for all your hair dilemmas 


I spent all of my teenage years not knowing this about bobby pins - which led to many a hairstyle malfunction! Bobby pins are meant to be used with the ‘bobbly’* side closest to the scalp - this creates the grip. Use them smooth side down and they will most likely slip right out of your hair - which is something we would rather avoid! If you find they fall out no matter which side up you use them, spray each pin with hairspray before using - it gives them a little extra 'stick'.

*Bobbly = technical term, in my humble opinion

4. Fixing Mascara Worries 

Issues with clumpy mascara? Do you ever find that your new mascaras apply way too much product? Grab yourself a disposable or an old, clean mascara wand and for your last step (when applying mascara), run a clean mascara wand through your freshly applied mascara. The clean wand works to remove any excess product and to prevent clumpy lashes, which helps to create fluttery, clump-free lashes. 

You want to make sure that you do this before the mascara sets - if you try when it’s ‘set’ and hardened, you risk getting fallout from the drier mascara all over your perfect makeup base. Before the mascara has set is the perfect time for this trick!   


5. Moisturising 

Ever have issues with streaky or blotchy makeup? There is a super quick fix for this one - wait once you have applied your moisturiser, before you start applying your foundation. You want to make sure that your skincare has time to sink into your skin and ‘dry’ before applying any foundations - especially if the makeup du jour is a cream or liquid formula. 

Not waiting might result in your makeup streaking and becoming blotchy because it won’t have the best ‘grip’ when applied onto a freshly moisturise, slightly slippery face. 


What are your favourite beauty tips?

xoxo


SHARE:

Monday, 30 November 2020

The November Edit


The weather outside might be frightful, but it needn’t leave you feeling grey. This time of year is all about giving yourself a little bit of extra lovin’ and beauty products have a wonderful way of soothing the soul. Shopping for new beauty goodies can be completely overwhelming and I know I am not alone in feeling rather daunted at knowing what to spend my money on. I am hoping these monthly edits - round-ups, of things that I have been loving, will help when it comes to knowing what is worth spending your money on. 

I would love to know what you have been loving this month and what products you can’t live without at the moment - let me know in the comments! 


The Inkey List Balm

I do love a cleansing balm and this one has been a favourite of mine for a quite a while now, especially since the weather has turned colder. A different take on the traditional, thicker-style cleansing balms, this offering from the Inkey List is delightfully devoid of fancy packaging and refreshingly straightforward in it's style. A thick-gooey texture that's wonderfully rich and nourishing, thanks to its main ingredient - oat. It melts down into an oil consistency when on the skin, making it great at breaking down makeup - even the most stubborn waterproof mascara. Ever so slightly grainy in its texture, it doubles up as a soothing, hydrating mask - some bonus multitasking points for you! Simple packaging and a really fab product, it’s a great addition to any skincare routine. 


Ren Cleanser 

Another cleanser I know - but I have been using and loving this non stop at the moment. A beautiful light creamy texture this cleanser is a dream - working to gently clean the skin without drying or stripping, it leaves it feeling clean, hydrated and gorgeously soft. It’s super gentle making it perfect for sensitive skin and it smells lovely too! 


BareMinerals Concealer

An oldie but a goodie - I have been a fan of BareMinerals for years and when it comes to wearing a lightweight concealer, that doesn’t skimp on coverage - this is one of my go-to products.  The powder formula blends beautifully into the skin and creates a natural, flawless coverage that looks just like skin. Thanks to the lack of nasties (parabens, binders and fillers) in the formulation and its mineral content, this concealer is perfect for preventing breakouts - making it perfect for those bad skin days when you want to cover up and prevent any further breakouts. 


Pixi Glow Tonic 

A game changing liquid exfoliator, Pixi’s Glow Tonic has been a fantastic addition to my skincare routine. The active ingredient, Glycolic Acid - loosens the bonds between dead skin cells, working to exfoliate the skin - leaving it looking smoother and brighter. It is 5% glycolic acid and has a non-alcohol base making it a great starter glycolic acid (if you are new to liquid exfoliating, as I was) and everyday toner. The key is to start slowly - using it once a week, letting your skin get used to it, before working up to a few times a week or even everyday use. If you feel a tingle on the skin, don’t be alarmed - it means it's working!


Pixi Rose Glow Face Mist 

Another offering from Pixi but the love affair with this mist continues and I am reaching for it now more than ever in the colder weather. Beautifully hydrating and soothing thanks to it's Rose and Argan oil base, it gives the skin an instant refresh and a gorgeous dewy glow. I use it in my skincare routine before and after makeup and throughout the day as a ‘pick-me-up’, to refresh and soothe my skin and makeup - which is especially useful in the cold weather. It even protects against free radicals! A fab multi-use product that really works for its place in your beauty collection it’s both useful and wonderfully pampering - the perfect combo in any beauty product if you ask me! 

SHARE:

Wednesday, 26 August 2020

5 Minute Makeup for your Next Zoom Meeting


So, you have a Zoom meeting at 9am and it’s currently 8.45am and you are just rolling out of bed… sound familiar? Since working from home I might not be in as might not be in as much of a rush as when I actually had to leave the house but the last minute dash to get ready, even if it’s only from the waist up, is real. Between throwing your hair into a ponytail and getting a suitable top on, what do you do to your face that might just reassure your boss and colleagues that you are a fully functioning adult, ready for responsibility? Here are a few tips for getting camera-call ready in a hurry. It’s All about the Prep You might be tight on time, but you won’t want to skip cleansing your face. Slather on your favourite moisturiser to prep and prime your skin and let’s get some makeup on. Base Seeing as we are going for speed, start with a concealer - only if you need it of course! Choose a heavier duty concealer, don’t worry if it looks heavier on your skin - that won't matter over camera - but what it will do is cover up a multitude of sins. Go for a creamy formula so it’s quick and easy to apply and use your finger to pat the product under your eyes and on any areas that need it the most. Going heavier with your concealer means you can skip foundation, which is great when in a hurry. If you just need something to even out your complexion - choose a lightweight tinted moisturiser, or a CC or BB cream. Eborian’s BB cream is my go-to everyday, lightweight base. Blush Time to add some colour - go for a fresh, gentle glow to add some life back into your cheeks. You might want to add a little more colour than normal - I can’t be the only one who finds that Facetime and Zoom calls tend to make you appear a tad washed out! Benefit’s Dallas is the perfect multi-use product, use it to warm up your complexion and as a blush, then sweep it over your eyelids to add a touch of colour and definition to your eyes - it gives the most gorgeous skin-kissed glow. Brows When on any kind of video call, your brows and your hair are the two most important things when it comes to framing your face. Go for a subtly defined brow, nothing too strong. Start by brushing your brows before you begin to shape them. I am a long-time lover of Benefit’s Goof Proof Brow, it’s so easy to use and the dual ends - brush on one side, waxy pencil on the other - makes it so user (and travel) friendly. Finish off with a touch of brow gel to keep them in place and volia - gorgeous brows! Mascara Curl your lashes first and follow up with your favourite mascara to define and ‘open’ your eyes. Try using a clear mascara if you are after a more natural look. I have been loving Too Faced’s Better than Sex mascara recently - it gives a beautiful fluttery definition to your lashes. Bold lip Last but by no means least - lips! I would opt for something very natural a sort of your lips but better look, that way you get the colour you need without looking like you have anything on! A coloured lip balm would be my go to - looks natural, plus your lips will stay gorgeously soft! I filmed this whole look, if you fancy watching it -


Whats your favourite go-to zoom makeup look?


SHARE:

Monday, 11 May 2020

Hairstyles in a Hurry


In a hurry? I've got you - try one of these super quick and easy hairstyles, all of which can be done in under 60 seconds!

I am guilty of leaving my hair to the last minute when getting ready, which normally means I end up throwing it into a bun or a ponytail at the last minute.

If you wanted something a little more than your average ponytail (no hate on the humble ponytail, I love them), try out one of these looks the next time you are in a hair-rush!


Which look is your favourite? 
xoxo
SHARE:

Sunday, 10 May 2020

Duvet Day


When I woke up this morning, the sunshine which was pouring through the window only yesterday, seemed to have left the skies for the first time in a little while (I know, shocking for London!).

A blanket of grey was covering the sky, the wind was howling outside and the threat of rain was whistling through the air, so I turned over, retreating back under the covers - the perfect day for a duvet day.


I hope I am not the only one who has been retreating into a safe, quiet, and gentle space recently - given everything that is happening in the world at the moment. So if you are in need of a quiet day, here are a few of my favourite things for the perfect duvet day.

Forget that snooze button - today is not the day for alarms!

The Sound Of Music Movie GIFs - Get the best GIF on GIPHY

Building your nest

Settle wherever suits you, building your nest on the sofa or in your bed, just bring all the pillows and cosy blankets!


If you are going to stay in bed, nothing beats gorgeous sheets, my favourites will always be from the White Company, smooth and silky your kind of thing? Try these 

Their website has a wonderful buying guide, if you aren’t sure which sheets might suit you - you can check it out here 


If you are looking for something a little less pricey - try this set from H&M and this bottom sheet. A smidgen of the price and the perfect silk-cotton mix.

Right, nest sorted, its time to get serious. Arm yourself with snacks of your choice and cue up your favourite shows for some serious movie/Netflix binging…


Top Movie Picks 

I love films - like, seriously love them. So I could be here all day telling you about my favourites. Choosing the perfect film always depends on your mood…

In the mood for some seriously good (not-that-easy-to-watch) All Time Greats?

Try: Shawshank Redemption, Seven, Silence of the Lambs, The Godfather, The Dark Knight - I could be here for a while…

In the mood for All Time Greats?

How about: Forrest Gump, Singin’ in the Rain, It’s a Wonderful Life, Gone with the Wind, Ferris Bueller's Day Off, Breakfast at Tiffany’s, Lord of the Rings: The Return of the King

Fancy some super-easy-to-watch bingeable films?

Try: The Lord of the Rings Trilogy, Star Wars, the Marvel universe films - those might take you more than a day!

Want a giggle?

How about: Shaun of the Dead, Clueless, Bridesmaids, 21 Jump Street (and 22 Jump Street)

There are so many - too many to mention, but those would be the first ones that I might pick. What would be your go-to film for each mood?

This is IMDB’s list of Ultimate Duvet Day films - do you agree with their picks?

Turning to Netflix instead?

Sex Education - I laughed and cringed my way through in equal measures, its so good.

Stranger Things - is just.. Epic

The Crown - a walk through history, through the eyes of the Queen

Suits - fast paced and witty, although the lawyers seem to spend more time breaking laws rather than abiding by them.

Planet Earth, Blue Planet - any David Attenborough nature doc - needs no introduction

I know I need to watch more Netflix shows - which ones would you pick?

Time for a spot of reading?

Confession, I studied English Literature at university - so I love books, but I will admit that I haven’t been reading as much as I should recently. That said, a few titles that I would reach for on a duvet day might be -

Want to get lost in a novel?

I am thinking - Jane Eyre, any Jane Austin book: but maybe try Northanger Abbey, Pride and Prejudice  and Sense and Sensibility, Wuthering Heights, Tess of the d’Urbervilles, (are you sensing a theme here?) and if you want to escape from reality; The Hobbit

Fancy a really, really good book?

You can’t go wrong with these: To Kill a Mockingbird, The Great Gatsby, Anna Karenina, The Color Purple (again I could be here all day…)

Something easy/beauty themed? I did a round up of the Best Beauty books here 

I have only just scratched the surface - these are just a few books that I would reach for on a duvet day - what would you choose to read?

Now, where is the popcorn? 


What is your go-to duvet day agenda? I would love to know!
xoxo 


SHARE:

Sunday, 3 May 2020

How to Clean Makeup Brushes


For some unknown reason cleaning makeup brushes is one of those jobs that I try and avoid at all costs. It’s way too easy to go for weeks without turning your attention to cleaning the things that apply your face of the day, everyday. 

But here’s the thing - unwashed, dirty brushes make a great home for bacteria, which can lead to breakout, plus a buildup of product can ruin the bristles over time and make the application process way more difficult.


Breakouts and broken brushes - I’ll pass thank you.

The thing is, running the brushes under the tap isn’t quite going to cut it when it comes to fixing the whole breakouts and broken bristles thing. Stick with me though, I promise it’s not that bad - these tips will help save your skin and your brushes and there is minimal effort involved, I promise.

How frequently you wash your brushes depends on how much and what you use them for. I personally think washing them every week, to every two weeks, is best.

Tools at the Ready 

When it comes to choosing your soap the key thing is to pick a gentle one that won't destroy your brushes. There are lots of specific makeup brush cleaners out there, but you can use any baby shampoo, mild soap or a gentle face cleanser that you have to hand.

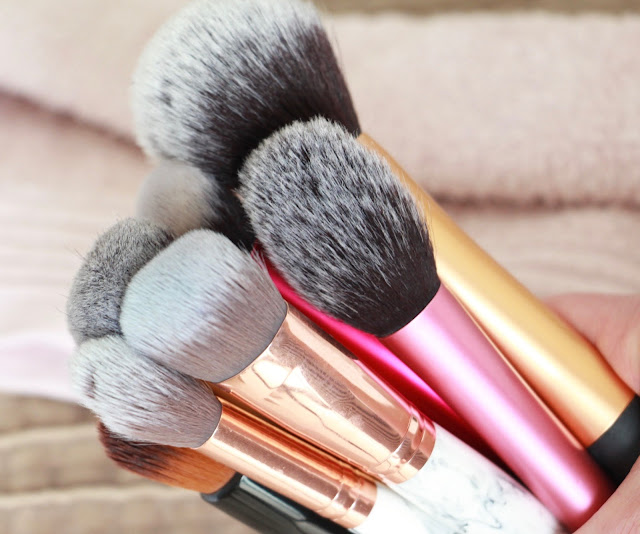
Aside from soap, you need a couple of extra things. Although your hands work perfectly well, I find a cleansing mat really helpful when it comes to getting rid of any stubborn makeup that’s refusing to budge. I have this one, which is great.


Grab yourself a towel and you are ready to go.

The key thing to remember, before you start is - we want to keep water away from the glue at the base of the bristles. If water gets into the glue, it can loosen the bristles (which are held by the glue), which leads to bristles malting all over your face when you next apply your foundation, which is not a good look.


Keeping water away from the brush handles will help prevent any problems with glue and bristles, plus if your brushes have wooden handles, they won’t get warped over time.

Start by adding a blob of shampoo, soap, your cleanser of choice, into the palm of your hand, before gently swirling the wet bristles into the cleanser, rinsing and re-swirling until any traces of makeup have gone.


It’s tempting to scrub brushes in an effort to remove makeup that is hard to reach, but this just ruins the brush shape. The cleansing mat comes into its own here (just don’t press too hard), helping to get rid of stubborn makeup, minus any reshaping issues!


Use your hand to squeeze any excess water out of the bristles and to reshape, if you notice your cleaning efforts have altered the shape in any way. I find that gently flicking the water out of the bristles helps, before reshaping with your hand.


Next, you’ll want to leave them to dry - fold one edge of a towel to create a slight slant, before laying your brushes flat on the towel, with the handles on the top the folded edge - so the water runs down - away from the glue, at the base to the bristles.


Leave them to dry for a few hours - I tend to wash mine in the evening and leave them overnight, so they are ready to go in the morning!


Voila - sparkly clean brushes, with minimal effort - not as bad as you thought right?

What are your top tips for cleaning your makeup brushes? 
xoxo


SHARE:

Monday, 27 April 2020

Mani-Monday // A Favourite Nude from OPI


The weather was so beautiful in London this weekend, I wanted to celebrate with some of my favourite Spring-appropriate nude shades. I lined some of my favourites up, before choosing my shade du jour.

I love a Sunday evening spent indulging with a bubble bath, a face mask, and then putting on a great film, while I paint my nails.


I start by trimming and filing my nails, before gently pushing my cuticles back. I chose one of my favourite nude shades, OPI’s Dulce de Leche.


Not only is it a gorgeous colour, so classic and easy to wear, but it only takes two coats to give a smooth glossy finish.


I finish off with Sally Hanson’s Quick Dry Top Coat, which is great if you are in a rush. It gives you a glorious glossy finish and I find it keeps my nails chip-free for longer than other quick-drying top coats.

What nail colour have you been reaching for recently? 

xoxo 

SHARE:

Sunday, 26 April 2020

This Week's Best in Beauty


I thought it might be fun to start an edit, rounding up some of my favourite beauty-related things in the form of a short and snappy weekly favourites blog - let me know if you like this kind of post!

So, without further ado, here are a few things that I have been loving this week.


Elf’s Dewy Setting Mist - a lovely lightweight mist, it sets your makeup in place, leaving a gorgeous dewy finish - minus any sticky or stiff feeling. Unlike some setting sprays, this one is  also great for refreshing your makeup look throughout the day.

Infused with coconut, it smells delicious - think natural coconut, not chemically coconut - plus the coconut means it’s great for keeping your skin hydrated.

It works wonders when setting makeup in place, and it gives any powder products a natural, dewy ‘like-skin’ look.

This spray is perfect if you are looking for a way to set your face, while creating a natural finish - it keeps your makeup in place all day, it’s refreshing, hydrating, and at a price that doesn’t break the bank.


Neil’s Yard White Tea Facial Mist - there seems to have been a mist theme going on this week, doesn’t there? I have been loving this particular mist so much, it is also in my monthly favourites round up, over on Youtube.

I really love this spray. This mini was a gift and I used it up in a flash - testament to how much I love it.

It can be used to refresh, calm and hydrate your skin - whenever you need it - whether its during your skincare routine, throughout the day, and over makeup.

It’s beautifully lightweight and it's one of those products that gives you an instant result. My skin felt soothed and hydrated from the first time I used it.

Its perfect for sensitive skin, thanks to its lovely natural ingredients, which include aloe vera - amazing for soothing inflammation and hydrating.

The main ingredient is of course, White Tea, which is rich in antioxidants - which give your skin a pick-me-up, while also helping to protect it from pollution - essential when living in London!


Kiehl’s Butterstick Lip Treatment, in Simply Rose - I love Kiehl’s products and this lip treatment is no different. A hydrating hero for your lips, it's made up of a blend of butters (the main one, being lemon butter) and oils (including coconut oil, increasing it’s hydration powers), creating a nourishing lip balm.

It is a gorgeous lip balm which not only looks beautifully natural when on, it also soothes and hydrates, helping to cure (and avoid) any chapped lips  - a true multitasker. Don’t expect a very pigmented finish, it's more of a ‘my lips but better’ finish.

Bonus points - has SPF 25 - making it perfect for sun-seekers.

Last, but by no means least, this gorgeous Hand cream from The Body Shop.


The Body Shop English Rose Hand cream -  I love anything rose scented and this has a beautiful, light and natural scent. Deliciously rich, it is super hydrating and absorbs into the skin quickly - so none of that post-lotion-greasiness.

It’s a great size for your handbag and I love using it before bed for some hand-hydration and it’s gorgeous rose scent.


What products have you been loving this week? 

xoxo

SHARE:
© OliviaCicely. All rights reserved.
Blogger Templates by pipdig