Sunday, 21 March 2021

Brownies for the Soul


Lockdown in London is in full swing and despite having more negatives than positives, finding the light every single day has become my mission. I am finding that it's the little things in life that help lift the spirits at the moment, from deliciously long bubble baths and weekend walks, to finding a new favourite show on Netflix and baking scrumptious goodies. I have been loving baking brownies recently and I just had to share my favourite lockdown treat with you all. 

It's a slight departure from my usual beauty content but this is baking and brownies to feed our souls - which counts as inner beauty, right? 

This is a Mary Berry recipe (which explains why it is so great) but I have made a couple of adjustments. The original recipe is from Mary Berry's Complete Cookbook - I found it here.

You will need: (makes 24 squares, depending on your cutting skills)

375g plain chocolate, broken into pieces

250g butter

2 teaspoons instant coffee

2 tablespoons hot water

2 eggs

250g caster sugar

1 teaspoon vanilla extract

90g self-raising flour

250g plain chocolate chips (over the many brownie batches I have whipped up, I have used dark, milk and a mixture of white and milk chocolate drops and as you can probably guess, all options were deliciously divine. The brownies pictures were made with milk chocolate drops!) 

The main event: 

First things first, you’ll want to grease a 30x23 cm baking tin and line it with greaseproof paper, then grease the paper - to ensure that you have no disasters with brownies not wanting to exit the tin. 

You will need to preheat your oven to 180°C/Fan 160°C/gas 4.

Next up its time to create the most delightfully delicious mixture of chocolate and butter. Smash your chocolate into pieces and pop them into a bowl, alongside your cubbed butter. Pop the bowl on top of a pan of boiling water ‘al-la bain-marie’ and let the two melt, stirring to combine. 


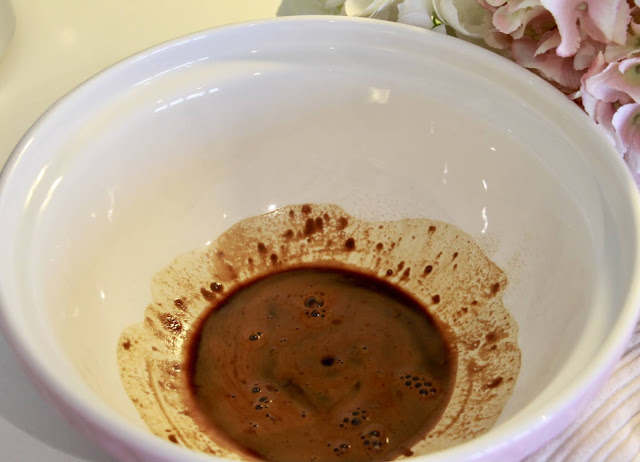
Be patient as the butter-chocolate mixture turns liquid, melting into a rich, silky smooth puddle of molten deliciousness. Once it’s melted and combined, take it off the water and put it to one side to cool, making sure to sneak one tiny taste - quality control is everything when making brownies! 

Boil the kettle and pop the instant coffee into a large mixing bowl, before adding the hot water and stirring to dissolve. 


Time to add the sugar, eggs and vanilla extract to the coffee, before beating the whole lot together. I find the more air you can get into the mixture at this point, the better. Whisk until the mixture has doubled in volume and has turned a gorgeous toffee colour. 

Take your mixture from this... 


To this ... it should have (roughly) doubled in volume.


Next up you’ll want to add your chocolate mixture to the eggs and sugar. 
Gradually tip the chocolate lava into the eggs and sugar mix a tiny bit at a time, beating as you go, making sure that the chocolate is fully combined before you add more. 


The mixture should turn a delightful chocolate brown colour and begin to thicken and should end up looking like this... 


Once you have a devilishly thick, richly coloured mix, you’ll want to sift in the flour and fold it in to combine. 


Once the flour is combined, the mixture should be wonderfully thick and a tad more 'batter-like' 


When there are no more flecks of white to be seen, add the chocolate drops and gently stir the mix until they are evenly combined.


The original recipe calls for walnuts too - which I am sure would be delicious, I just haven’t added them to mine this time!

Ease the thick mixture into your prepared tin and pop it into your preheated oven, ready for baking. The brownies should take between 35-45 minutes, depending on how hot your oven runs. 

I find that around 40 minutes is perfect. You want the crust to be crisp and slightly dull, while the middle remains gorgeously gooey. 

The edges of this batch caught a little in the oven, I was two minutes late taking them out of the oven! 


Once they are done, pop them on the side and admire your handiwork. 

You’ll need to wait for them too cool before lifting the whole thing out, using the paper, onto a cooling rack. 

You’ll find that they are very gooey to start off with, but they will firm up and be perfect served with a cup of tea or a glass of cold milk. 


    Enjoy xx


SHARE:

Wednesday, 17 March 2021

Smokey Eyes in a Hurry


Fancy a super quick, glamorous makeup look that’s really easy to do? I have got you covered with this really easy smokey eye tutorial. It's a one-product solution to a smokey eye that’s great if you are in a hurry or you are new to doing smokey eyes. 

If you are on the hunt for one the of best (in my humble opinion), one-product-eye makeup solutions, look no further than the By Terry Ombre Blackstars. Super creamy and easy to apply, they double as a cream eyeshadow, eyeliner and even a highlighter (depending on the colour). 


Let me know what you think of this look - it's my go-to when I need something that looks put-together, in a hurry! 


SHARE:

Sunday, 31 January 2021

Beauty Tips that Every Girl should Know

One of the many things that I love about beauty is that there is always something new to learn. Everyone has a different method and often, as with everything, the more mistakes you make - the more you learn. I thought I would share with you some of the top tips and tricks that I have learnt from being a makeup artist, learning from others and generally being a beauty obsessive - not to mention making my own fair share of beauty mistakes along the way! 


1. Use a setting spray to set your makeup

You leave the house with perfect makeup, go about your day only to look in the mirror at lunch to find that half of your concealer has melted off, meaning that your nose is looking a tad red - sound familiar? In order to stop any makeup malfunctions throughout the day, setting spray is going to be your new best friend. Working to set your makeup in place, these miracle mists provide extra hold, without adding any ‘weight’ to your complexion or leaving your skin feeling ‘tight’. There are lots of different options for every budget, from Collection, to Urban Decay and Charlotte Tilbury. 

I heard a little something about using hairspray to ‘set’ your makeup - please, whatever you do - don’t do this! 


A couple of my favourites: 1. Elf Dewy Setting Spray, 2. Urban Decay All Nighter, 3. Charlotte Tilbury Airbrush Flawless Finish, Maybelline Lasting Fix 

2. Lip Balm for the Eyebrows - and (nearly) everything else!

Lip balm is something that everyone has in their handbag and can be used for a multitude of different things including, of course, your lips! Dab a touch of clear lip balm on the high points of your cheeks and voila - you have a natural highlighter. Take a touch of lip balm on a disposable mascara wand (or an old, clean mascara wand) and use as you would brow gel. The clear balm works to tame brows and hold them in place! 


3. Bobby Pins - for all your hair dilemmas 


I spent all of my teenage years not knowing this about bobby pins - which led to many a hairstyle malfunction! Bobby pins are meant to be used with the ‘bobbly’* side closest to the scalp - this creates the grip. Use them smooth side down and they will most likely slip right out of your hair - which is something we would rather avoid! If you find they fall out no matter which side up you use them, spray each pin with hairspray before using - it gives them a little extra 'stick'.

*Bobbly = technical term, in my humble opinion

4. Fixing Mascara Worries 

Issues with clumpy mascara? Do you ever find that your new mascaras apply way too much product? Grab yourself a disposable or an old, clean mascara wand and for your last step (when applying mascara), run a clean mascara wand through your freshly applied mascara. The clean wand works to remove any excess product and to prevent clumpy lashes, which helps to create fluttery, clump-free lashes. 

You want to make sure that you do this before the mascara sets - if you try when it’s ‘set’ and hardened, you risk getting fallout from the drier mascara all over your perfect makeup base. Before the mascara has set is the perfect time for this trick!   


5. Moisturising 

Ever have issues with streaky or blotchy makeup? There is a super quick fix for this one - wait once you have applied your moisturiser, before you start applying your foundation. You want to make sure that your skincare has time to sink into your skin and ‘dry’ before applying any foundations - especially if the makeup du jour is a cream or liquid formula. 

Not waiting might result in your makeup streaking and becoming blotchy because it won’t have the best ‘grip’ when applied onto a freshly moisturise, slightly slippery face. 


What are your favourite beauty tips?

xoxo


SHARE:
© OliviaCicely. All rights reserved.
Blogger Templates by pipdig